> For the complete documentation index, see [llms.txt](https://docs.allganize.ai/alli-llm-app-market/llms.txt). Markdown versions of documentation pages are available by appending `.md` to page URLs; this page is available as [Markdown](https://docs.allganize.ai/alli-llm-app-market/faq/har-file.md).
# HARファイルの取得
## HARファイルの概要
**HAR(HTTP Archive)ファイル**は、Webブラウザが行った通信の詳細な記録を保存するためのファイルです。\
主に以下の情報を含んでいます
* ページを開く際に送信・受信された **リクエストとレスポンスの履歴**
* 通信のタイミング(読み込みに何秒かかったか)
* エラーの有無(ステータスコード 404や500など)
開発者やサポート担当者が問題の原因を調査する際に非常に役立ちます。
## HARファイルが必要なケース
* サイトの一部が表示されない
* ボタンを押しても動作しない
* 特定の操作でエラーが出る
といった **「自分の画面でしか起きていない不具合」** を再現・共有するために、HARファイルを使います。
不具合が発生している「その瞬間」の通信を記録することで、**エラーや問題点が特定しやすくなります**。
## ChromeでのHARファイルの取得手順
1. Chromeブラウザで、問題が発生しているページを開きます。
2. F12キーを押すか、画面上で右クリックして「検証」を選択して開発者ツールを開きます。
3. 「Network」タブをクリックします。
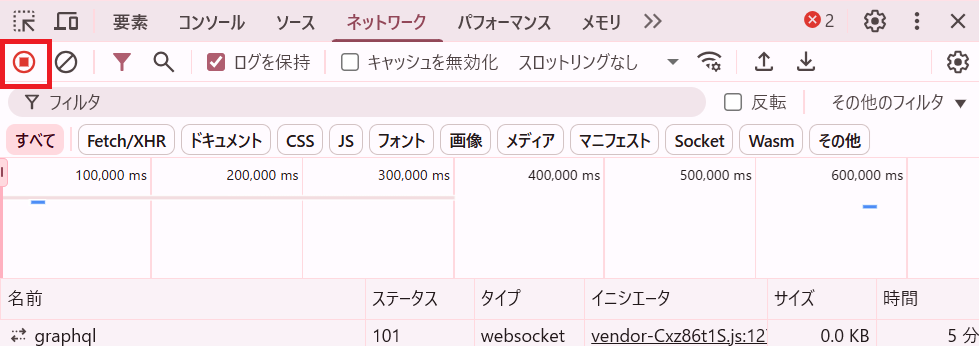
4. 画面上部の「●ネットワークログを記録ボタン」が赤くなっていることを確認します。黒ければクリックして赤くなるようにし、ログを記録します。
5. 「ログを保持(Preserve log)」にチェックを入れ、再読み込み時などのログを保持するように設定します。
6. 「Clear browser data」アイコン(斜線の入ったグレーの丸ボタン)をクリックして、既存のログをクリアします。
7. 問題が発生する操作を赤枠内で再現(操作)します。
8. 開発者ツールの「Network」タブに、問題に関連するリクエストが表示されます。
9. 「Export HAR...」アイコン(下向きの矢印アイコン)をクリックして、HARファイルを保存します。
10. 保存したHARファイルを再現手順(動画でも可)やエラー画面キャプチャと合わせて、Allganize Japanの担当営業やカスタマーサクセスに共有します。
## Microsoft EdgeでのHARファイルの取得手順
1. Edgeブラウザで、問題が発生しているページを開きます。
2. F12キーを押すか、画面上で右クリックして「開発者ツールで調査する(検証)」を選択して開発者ツールを開きます。
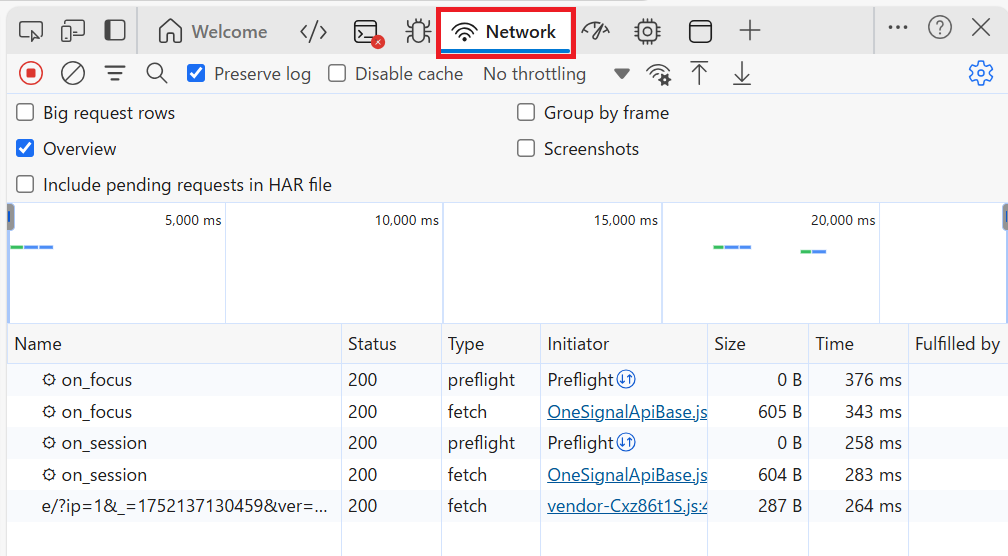
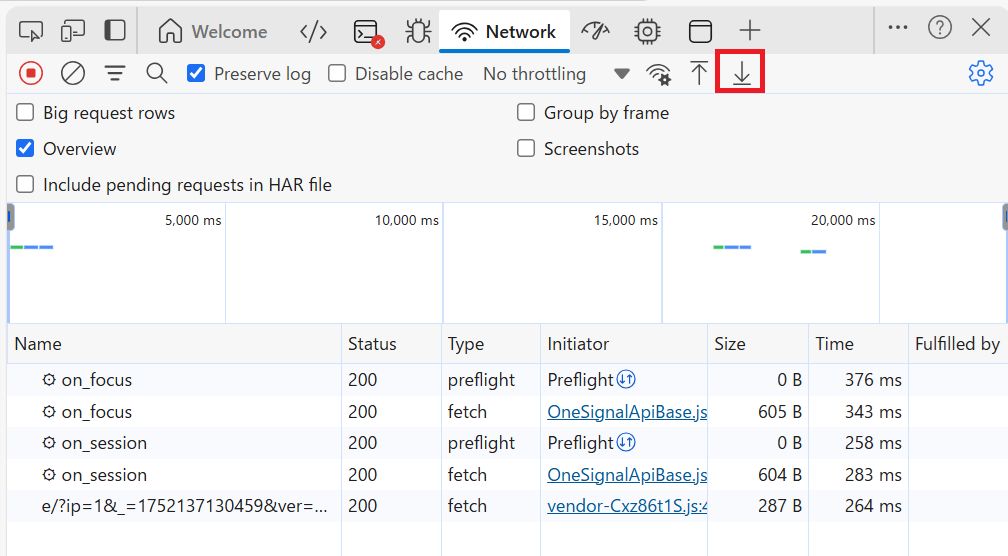
3. 「ネットワーク」タブをクリックします。
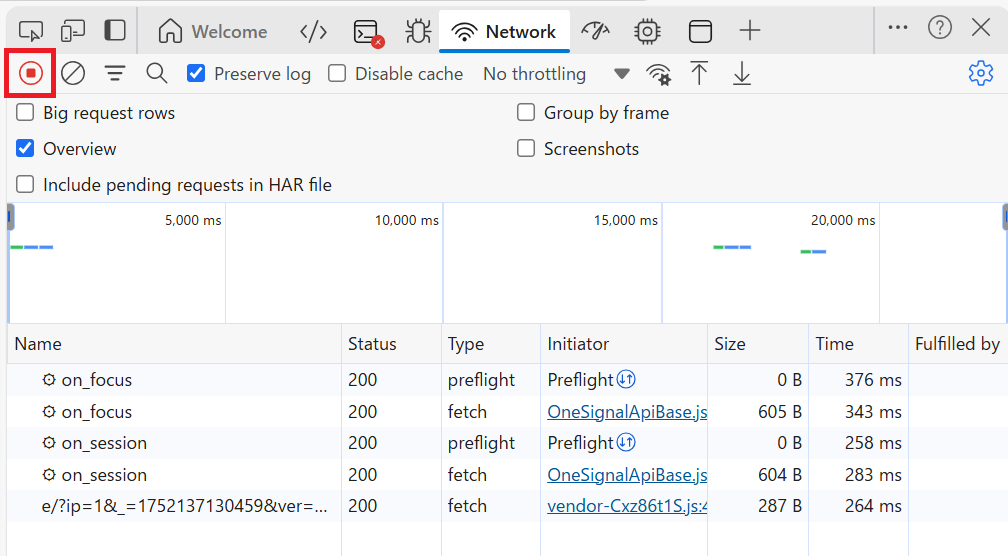
4. 画面上部の「●ネットワークログを記録ボタン」が赤くなっていることを確認します。黒ければクリックして赤くなるようにし、ログを記録します。
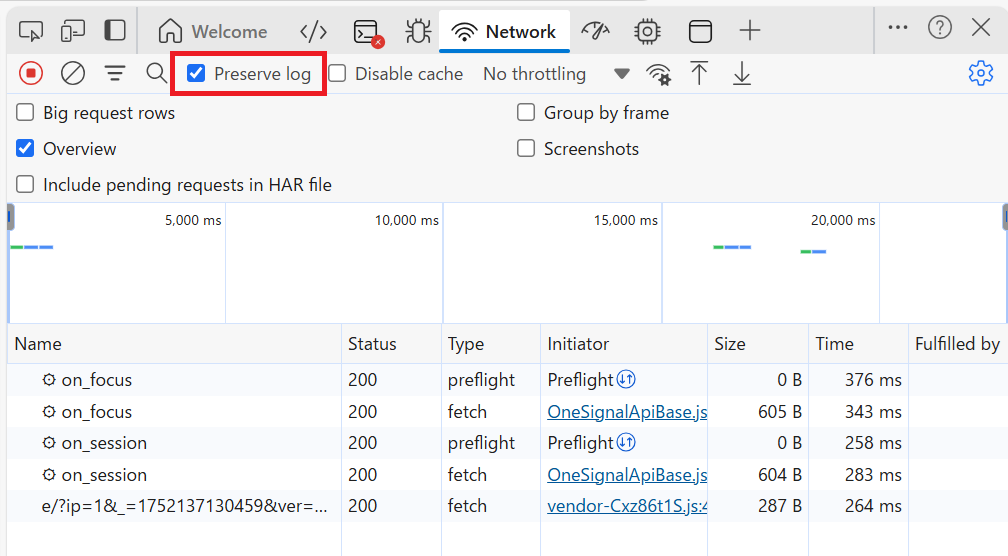
5. 「ログを保持(Preserve log)」にチェックを入れ、再読み込み時などのログを保持するように設定します。
6. 「Clear network log」アイコン(斜線の入ったグレーの丸ボタン)をクリックして、既存のログをクリアします。
7. 問題が発生する操作を赤枠内で再現(操作)します。
8. 開発者ツールの「ネットワーク」タブに、問題に関連するリクエストが表示されます。
9. 「HARをエクスポート...」アイコン(下向きの矢印アイコン)をクリックして、HARファイルを保存します。
10. 保存したHARファイルを再現手順(動画でも可)やエラー画面キャプチャと合わせて、Allganize Japanの担当営業やカスタマーサクセスに共有します。
---
# Agent Instructions
This documentation is published with GitBook. GitBook is the documentation platform designed so that both humans and AI agents can read, navigate, and reason over technical content effectively. Learn more at gitbook.com.
## Querying This Documentation
If you need additional information that is not directly available in this page, you can query the documentation dynamically by asking a question.
Perform an HTTP GET request on the current page URL with the `ask` query parameter, and the optional `goal` query parameter:
```
GET https://docs.allganize.ai/alli-llm-app-market/faq/har-file.md?ask=&goal=
```
`ask` is the immediate question: it should be specific, self-contained, and written in natural language.
`goal` is optional and describes the broader end goal you are ultimately trying to accomplish on behalf of the user. GitBook uses it to tailor the answer towards what is most useful for that goal.
The response will contain a direct answer to the question and relevant excerpts and sources from the documentation.
Use this mechanism when the answer is not explicitly present in the current page, you need clarification or additional context, or you want to retrieve related documentation sections.